Tuesday, July 2, 2024
Home Blog Page 94

Moodle Educators – Create a 5 star rating scale in your Moodle course

Moodle Educators - Create a 5 star rating scale in your Moodle course
Moodle Scales

Moodle as the name suggests is Modular in nature. It can be customized to meet eLearning requirements in all industries like Schools, Universities, Corporates etc. In Moodle there are many ways to rate or evaluate learners progress. You can use Outcomes, Grades & Scales including other advanced grading methods like Rubrics.

Dave Foord from Loughborough College shared his tips to create a 5-star scale in Moodle which will allow students to peer rate other students’ contributions. Check out his original blog post here.

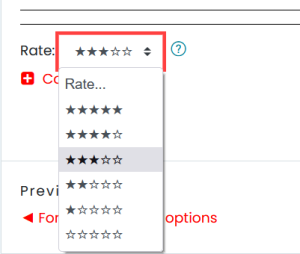
Image showing the 5 star scale as a dropdown
Image showing the 5 star scale as a dropdown (Image Credits – Dave Foord)

In Moodle, New scales can be created by teachers with editing rights or by administrators. You can use symbols from https://unicode-table.com/en/ to create stars or any other type of symbol. Go to Course administration > Grades > Scales to add a new scale in any course.


Enter the name of the scale as per your wish. In the scale field, enter ☆☆☆☆☆, ★☆☆☆☆, ★★☆☆☆, ★★★☆☆, ★★★★☆,★★★★★  as the values. When this scale is then used within an activity, the 6 different options will appear in a drop-down menu, and the student chooses the option they want.

Here is the video tutorial from Dave Foord to show how this new scale can be added in Moodle course:

What are the other Moodle tricks you are using to engage your learners? Please share with us in the comments section below.

Moodle Educators – How to make your Moodle courses read only for students

Moodle Educators - How to make your Moodle courses read only for students
Context Freezing Feature in Moodle

During the Year end procedures, Moodle Educators needed to make their courses as readable only without any further modification or any new addition of content. This will ensure that the students can still access the course resources without making any new change to course activities. There is a hidden feature in Moodle which allows the administrators to make categories, blocks, courses or course content ‘read-only’.

Since Moodle 3.6 version, there is a new feature added in the Moodle core called as “Context Freezing”. The feature is added as an experimental feature but it is very handy. So, let’s have a look how you can enable and use the “Context Freezing” to make your courses read only.

How to enable Context Freezing

First as an administrator, go to Site Administration > Development > Experimental Settings. Here you need to enable the Context Freezing checkbox. The next setting “Context freezing applies to administrators” will make sure that even administrators also can’t make any changes.

How to use Context Freezing

As a regular teacher, just navigate to the course which you want to make read only. On the secondary navigation bar, you will see an option for “Freeze this Context” under ‘More’.  This will make the whole course as read only. Similarly, you can also make any activity also as Read Only by going to site settings and then using “Freeze this context”.

Here is a video guide from Moodle HQ about the Context Freezing in Moodle:

Disclaimer – Please note that the Context Freezing feature is still an experimental feature and may allow duplication of activities, blocks etc. So, please use at a test environment before using it on your Moodle.

How to enroll users automatically in a Moodle course

Moodle Educators - Allow free access to your Moodle courses using Auto Enrol plugin
Auto enrol

Moodle is the world’s most popular open source LMS with over 300 million users around the world. The strong community backing is one of the main reason behind Moodle’s popularity. There are more than 1975 plugins contributed by the Moodle community. The architecture of Moodle is designed to easily extend the functionality by the means of Moodle plugins. It’s also clear from the name Modular  Object  Oriented  Dynamic  Learning  Environment.

Many Moodle Users were often look to provide open Moodle courses for all users in Moodle. These courses may include self-help courses like how to navigate, or open for feedback. Auto Enrol is one such plugin which is like the Swiss army knife of Enrollment plugins for Moodle.

Introducing Auto Enrol Moodle Plugin

The Auto Enrol plugin for Moodle was initially developed for use on courses which you want all users to be able to access. The plugin is well supported since then and is available for all Moodle versions including latest Moodle 4.0.

The plugin also includes advanced filtering mechanism to support automatically grouping and filtering users based upon their profile fields.

How to install:

To get started with the Auto Enrol plugin, you need to download it from the Moodle Plugins directory. Since, it is Enrollment method type Moodle plugin, you need to install it into your_moodle_site/enrol/  directory followed by completing the installation process through the Notifications page.

If you are not familiar with Moodle plugins installation, check out the complete Moodle Plugins Installation guide here.

How to Setup:

After installation, as an administrator you need to configure the default settings for this enrollment method when it is added to a course. The configuration option includes:

Add instance to new courses, Allow new enrolments, Enable self unenrol, Max enrolled users, Send course welcome message & Enabled availability plugins. You can restrict by Activity Completion, Date, Group, Grade, Groupings, Profile.

As a teacher, you need to go to the course where you want to add the Auto Enrol plugin as an enrolment method. Navigate to Course Participants > Enrollment Methods and Add Auto Enrol at the bottom of the page.

The settings page includes options for – Default assigned role, When to Enrol, Enrollment duration, Automatically unenrol inactive users etc. In the bottom part you will see the restrictions criteria which will allow users to enrol when they meet the defined criteria.

You can also add users to groups based on specific criteria like Language, Department, Address etc.

Points to be noted:

  • If you allow “Allow enrolments on login“, it may impact the site and result in slowdown your site performance.
  • You can also define to unenrol users who are inactive for certain duration and the action to carry out when the user filtering rule is no more matched.

I had tested this plugin on my Moodle local development site running Moodle 4.0 version on XAMPP environment. I really like the simple and amazing features provided by this awesome plugin which makes the enrollment process simpler to manage. If you are looking for such feature, you should give a try to this plugin.

What are the other Moodle plugins which you like as Moodle Administrator? Do share with us in the comments section below.
Using Moodle on XAMPP – What’s the Path to PHP CLI

Using Moodle on XAMPP - What's the Path to PHP CLI

While trying to use the H5P activity in new Moodle environment for the first time, I came across the problem that there were no content types were installed. By default Moodle core includes a schedule task to Download available H5P content types from h5p.org. However, since I was running the Moodle in a local environment based on XAMPP, so it was not working.

Looking around Moodle documentation, I understood that to install the H5P content types, first the Moodle cron job has to be setup and running. After doing that, I was still not able to run individual tasks in Scheduled Tasks list.

Deep diving further, I understood  that to be able to run individual scheduled tasks via ‘Run now’ links on the scheduled tasks page, there are two conditions which needs to be met:

  • Condition 1: ‘Allow ‘Run now’ for scheduled tasks’ (tool_task | enablerunnow) in Site administration / Security / Site security settings should be enabled
  • Condition 2: ‘Path to PHP CLI’ (pathtophp) in Site administration / Server / System paths should be set.

After enabling the first one, I was stuck up with the PHP CLI Path for XAMPP. So for the help of all Moodle users who are using Moodle with XAMPP, here is the path to PHP CLI which needs to be entered:

C:\xampp\php\php.exe

You can save this as system path and then you can run the scheduled task individually in Moodle. Pl share in the comments below if this post was helpful for you.

Check out the new Moodle jobs this week

Check out the new Moodle jobs this week

Moodle is world’s most popular open source Learning Management System. It is used by over 300 million users around the world in 241 countries. There are many job opportunities for Moodle developers, Administrators, experts to showcase their Moodle skills.

In this weekly roundup of latest Moodle Jobs, here we are listing down the jobs listed on Moodle.org Jobs Database. You can check out the following jobs and apply for the same if you are eligible & interested for the same.

Moodle Jobs This Week

  • Developer
    • Type: Contract
    • Location: remote
    • Description – We have our own hosting, and are looking for someone to help back up and upgrade our site, as well as support with initial design and functionality and other ad hoc support.
  • Senior Learning Management System (LMS) Administrator
    • Type: Full-time
    • Location: Boston, MA, USA
    • Description: This is an onsite Moodle Administrator position situated in the Metro-Boston area, Massachusetts, USA. University is looking for a Senior Learning Management System (LMS) Administrator that provides application administration for the LMS and associated components including plug-ins, integrations, and supporting systems. Possessing strong analyst and developer skills, the individual provides tier-2 and tier-3 technical support, develops and monitors processes geared to proactively detect system issues, creates and maintains system documentation, and develops training resources. The Senior LMS Administrator leads other administrator and development team resources on projects such as product and infrastructure upgrades.
    • Click here to Apply
  • BackEnd Developer
    • Type: Full-time
    • Location: Milano
    • Description: Looking for Back End Developer who contributes proactivity , curiosity , energy and enthusiasm to the development of our Digital Learning projects.
  • Help Desk Specialist/Delivery
    • Type: Full-time
    • Location: Milano
    • Description: Looking for Help Desk Specialist who contributes with proactivity , energy and enthusiasm to our Digital Learning projects, processes an active assistance of the client’s knowledge and the ability to provide technical support to help us profit from our work and use of our training environment.

For all Moodle Jobs available now check out the Moodle Jobs database here.

Free Moodle Webinar – Significant Learning Experiences in Moodle

Free Moodle Webinar - Significant Learning Experiences in Moodle

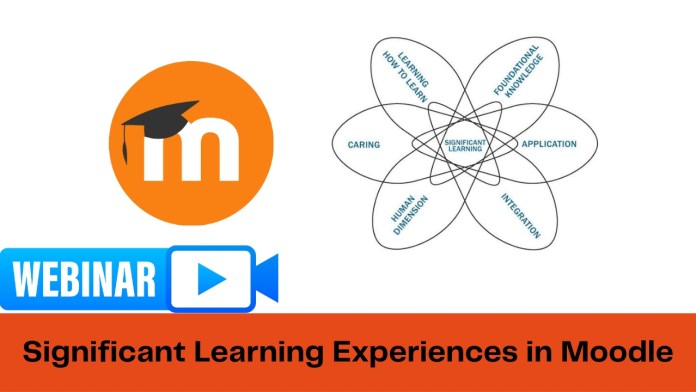
Moodle HQ is hosting a free webinar on Significant Learning Experiences in Moodle. The webinar will be hosted on 24 May 2022 2:00 PM US & Canada Time.

The free webinar will use Fink’s (2013) taxonomy of significant learning experiences and framework for integrated course design to explore Moodle activities, resources, and features.

Fink’s taxonomy of signinfcant learning taxonomy includes:

  • Foundational Knowledge: understanding and remembering information and ideas
  • Application: skills, critical thinking, creative thinking, practical thinking, and managing projects
  • Integration: connecting information, ideas, perspectives, people, or realms of life
  • Human Dimension: learning about oneself and others
  • Caring: developing new feelings, interests, and values
  • Learning How to Learn: becoming a better student, inquiring about a subject, becoming a self-directed learner

During the webinar the Moodle HQ team will help you in understanding how Moodle can support the Fink’s taxonomy.

The webinar is suitabe for all Moodle Course creators, Educators, Instructional designers.

You can register for the webinar through this link. For all upcoming webinars, please check out Moodle HQ’s events page.

Create Awesome Presentations in Moodle using SlideMania

Create Awesome Presentations in Moodle using SlideMania

After the COVID-19 pandemic the whole scenarion for teaching has changed. Now, the teachers need to use more resources online like Presentations and make more interactive assessments.

It is the part and parcel of the Moodle teachers job but in this post, I will share details about one more free education resource – SlidesMania which will help you in making thrilling presentations.

You can use SlidesMania to create stunning presenations on different themes. Once you have created a presentation, you can use this guide to embed presentation files in Moodle Course.

Slidesmania offers Free creative PowerPoint templates and Google Slides themes which you can use to create stunning presentations. SlidesMania has been selected as one of the 2022 Best Digital tools for Teaching and Learning by the AASL.

The site hosts hundreds of interesting presentation templates on wide variety of topics. You can either download the MS PowerPoint templates or else use the Google Slides templated. All the designs are completly editable and customizable.

You will also find some useful tips to take the google slides and powerpoint presentations to next levelon SlidesMania.

What are the other popular tools, you are using to create presentations for your Moodle LMS? Do Share with us in the comments section below.

Moodle 4.01 released with minor fixes

Moodle 4.01 released with minor fixes

In another milestone, minor version of Moodle – the world’s most popular open source LMS is released today. The new version – Moodle 4.0.1 is available to download from Moodle.org.

The new point release contains minor fixes from Moodle 4.0 release. Here are the brief fixes:

  • MDL-74461 – Not always possible to easily navigate back to section from an activity page
  • MDL-74514 – BigbluebuttonBN is polling the BigblueButton server too often
  • MDL-74481 – LTI Advantage: Non-Editing Teacher has role Student
  • MDL-74478 – Awarded badge for activity completion, despite not receiving a passing grade
  • MDL-74450 – The course secondary navigation should be displayed in the site home settings page
  • MDL-74317 – Edit mode cannot be turned on/off when using other capabilities
  • MDL-74436 – Fatal error when importing “course” events from ics file
  • MDL-74427 – Coding error detected when deleting question category

The next major version 4.1 is scheduled to be released in November 2022. It will have major focus on improving the User Experience for Moodle LMS. There will be many new features like:

  • Improving the integration with MoodleNet
  • Investigating and commencing the project to improve messaging in Moodle (proposed integration with Matrix messaging)
  • MUA projects to improve the Database and Assignment activities
  • Continuing the Question bank improvements project.

Mahara New version 22.04 released with new features

Mahara New version 22.04 released with new features

Mahara is the world’s most popular open source web eportfolio system. It is a stand-alone system that can be integrated into a wider virtual learning framework. It allows users to record and share evidence of lifelong learning.

The new version of Mahara i.e. 22.04 is released with many new features. Here are the major highlights:

The highlights of Mahara 22.04 version are:

  • Support for Elasticsearch 7
  • Check portfolios for similarities with Ouriginal in Moodle
  • Assign a new role: Institution support administrator
  • Move institution members more easily via SAML
  • Upload files via web services
  • Set up portfolio completion collection on the group level
  • Prevent changes to sign-off blocks in templates
  • Download SmartEvidence frameworks
  • Install and update languages

You can download the latest Mahara version from the official website here.

Moodle Tips – How to upload powerpoint files in Moodle

Moodle Tips - How to upload powerpoint files in Moodle
How to upload powerpoint files in Moodle

Using powerpoint slides in elearning course is almost a first requirement for all teachers. There are many tools in Moodle which can be used by the teachers to deliver similar information instead of using powerpoint files. However, since many teachers have slideshows ready, so in this post we will learn about using powerpoint files in Moodle.

There are many options to create slideshows in Moodle. Many plugin provide the similar options as mentioned below but we will be covering only the ways relevant to Moodle 4.0

  • Microsoft Powerpoint files & Google Slides
  • H5P Course Presentation Content Type
  • iContent plugin – It was a good plugin but it is not maintained actively in Moodle Plugins directory. So we will not be covering this.
  • Presentation Plugin – It was a good plugin but it is not maintained actively in Moodle Plugins directory. So we will not be covering this.

Today, we will see how to use the Microsoft Powerpoint files & Google Slides in Moodle course.

Using the Powerpoint in Moodle course comes with the usage required. If you just want the students to download the presentation from Moodle and go through at their own leisure, you can use file resource. So before proceeding further, let me ask you few questions:

  • Do you want to embed the slideshow in Moodle course?
  • Do you want to share the presentation with students so they can go through that on their own.
  • Can you export the slides into another format like PDF or even video?
  • Can’t you create the same content in Moodle Book resource or Moodle Lesson activity.

Embed Microsoft PowerPoint Presentation in Moodle course

Let me start with the example that you have a Microsoft PowerPoint presentation, and you want to share it to the students to let them download. To get started:

  • Login to your Moodle course and turn on the editing mode.
  • Simply Drag and drop the PowerPoint file onto the course section, where you want to add. It will be added as a file resource
  • Whenever the student click on that file resource, it will be downloaded (depending on the their browser settings), to their device.
  • Done.

Now let’s take another example that you want to just show it in your course without directly downloading to the students’ devices.

  • Upload your PowerPoint pesentation to any slide share platform like Google Slides, SlideShare.net etc.
  • For SlideShare:
    • Scroll down and click the Share button and copy the embed code.
    • Login to your Moodle course and turn on the editing mode.
    • Embed it into Moodle course either using Label or Page Resource.
    • Use the HTML code button in the second row of Atto Editor to embed the code.
  • For Google Slides:
    • Click File > Publish to the web > Embed.
    • Choose Size and copy the embed code.
    • Login to your Moodle course and turn on the editing mode.
    • Embed it into Moodle course either using Label or Page Resource.
    • Use the HTML code button in the second row of Atto Editor to embed the code.

In case you are using Microsoft PowerPoint online through web browser. You can directly embed your presentation in your Moodle course easily. Here is a brief screencast showing how you can embed PowerPoint in your Moodle course:

Please follow these steps:

  1. Login to your Microsoft Office 365 account through – https://www.office.com/?auth=1
  2. Create your PowerPoint Pesentation or upload it if you have already created.
  3. Once you open the presentation, just go to File >Share >Embed.
  4. You will get the embed code from the popup.
  5. Now, Go to your Moodle course and click on add an activity or Resource And then choose page resource.
  6. Choose the HTML code in the editor toolbar and paste the embed code here.
  7. Click Save Changes.

In the next part of this series, I will cover the H5P Course Presentation content type. Trust me, H5P is the most exciting way to create & reuse interactive content easily.

For regular updates about Moodle, eLearning and edtech industry, please visit us regularly at https://lmsdaily.com. You can also like us on Facebook or follow us on Twitter, or Subscribe our YouTube Channel.